Vintage leather possesses an irreplaceable visual character, tactile depth, and historical charm that brand-new garments simply cannot replicate. However, when an authentic leather coat, bag, or pair of boots sits neglected in an attic or closet for decades, the organic hide undergoes severe dehydration. Natural tanning oils evaporate, dust settles into the pores, surface micro-fissures begin to form, and the hide transforms from supple and flexible to stiff, brittle, and dry. Learning how to restore old leather allows you to revive neglected heirlooms and thrifted treasures, transforming worn-out outerwear into a stunning, wearable investment piece.
In 2026, the rise of heritage menswear, vintage curation, and circular fashion has made reconditioning classic garments a premier skill. Genuine animal hide is exceptionally resilient; as long as the structural fibers have not rotted away completely, even severely dried and faded items can be rehydrated and revitalized. This operational blueprint details the exact steps, conditioning chemistry, and fiber repair techniques to teach you how to restore old leather safely without darkening the grain unevenly or damaging the original patina.
Assessing Vintage Hide Integrity: Can the Leather Be Saved?
Before investing time and products into a full restoration project, you must inspect the structural condition of the hide to verify that the fibers are still stable.
| Condition Stage | Visual & Tactile Indicators | Restoration Feasibility |
| Surface Dehydration | Stiff feel, dull finish, light chalky surface | 100% Restorable. Deep conditioning will fully restore suppleness. |
| Surface Micro-Cracking | Fine hairline cracks in the top grain layer | Fully Restorable. Requires rehydration plus grain-filling balm. |
| Flaking / Deep Fissures | Deep cracks penetrating into the suede core | Partially Restorable. Rehydration prevents further splitting; requires filler. |
| Dry Rot (Red Rot) | Leather turns into reddish powder upon friction | Irreversible. Structural protein bonds have broken down completely. |
If your vintage piece passes the structural flexibility test without crumbling into powder, it is an ideal candidate for full rejuvenation. For targeted advice on managing hardening hides before they fracture, review our detailed guide on how to soften stiff leather safely.
Essential Supplies for Vintage Leather Restoration
Proper restoration requires specialized ph-neutral formulas designed to nourish without clogging the porous grain structure:
Specialist Leather Cleaner: A pH-balanced saddle soap or foaming leather cleaner (never use harsh dish detergents).
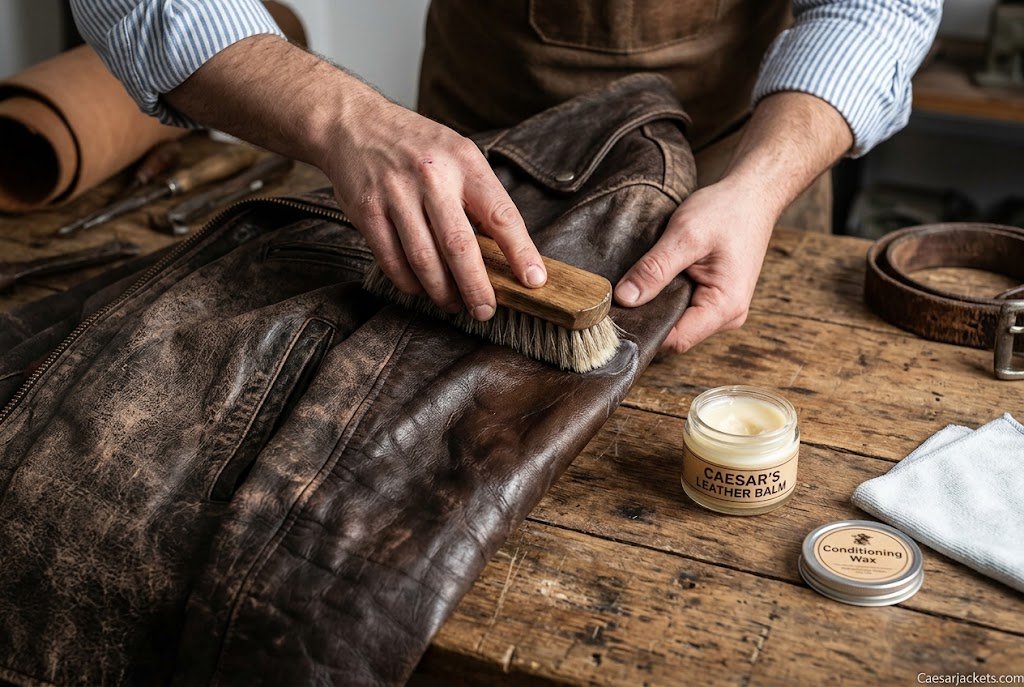
Soft Horsehair Brush: Essential for lifting surface dirt without scratching aged finishes.
Microfiber Cloths: For applying balms, wiping lather, and buffing the final sheen.
Deep-Penetrating Leather Rehydrator / Conditioner: Formulated with natural oils, beeswax, or lanolin.
Leather Recoloring Balm or Cream Polish: Color-matched pigment to blend faded friction points.
Flexible Crack Filler (Optional): For smoothing out pronounced surface crevices.
Step-by-Step Guide: How to Restore Old Leather at Home
Follow this methodical four-phase protocol to systematically wash, nourish, repair, and protect your aged leather items.
Phase One: Deep Cleaning and Surface Preparation
Decades of stored grime, skin oils, and ambient dust must be cleared before applying any conditioner. If you apply balms over a dirty surface, you will seal the grime deep into the hide’s open pores.
Dry Dusting: Use a dry horsehair brush to sweep over seams, pockets, and collars to dislodge loose debris.
Apply pH-Balanced Cleaner: Dampen a microfiber sponge slightly with distilled water and work a small dab of saddle soap into a light foam.
Gentle Circular Motion: Work the foam across the panels in small, circular motions. Avoid soaking the hide; use the foam to lift oxidized oils rather than saturating the leather core.
Wipe Clean: Immediately wipe away dirty lather using a clean, slightly damp microfiber cloth. Allow the piece to air-dry in a well-ventilated room for two hours. For comprehensive cleaning routines, consult our masterclass on how to clean leather jackets properly.
Phase Two: Rehydrating Dried Protein Fibers
The most critical element of understanding how to restore old leather is introducing moisture gradually. Trying to fix bone-dry leather with one heavy coating of thick wax will leave a greasy film on the surface while leaving the core fibers parched.
Apply Thin Layers: Scoop a small amount of liquid or cream-based deep conditioner onto a microfiber pad.
Massage Deeply: Rub the conditioner into the grain using firm, warming hand friction. Focus extra attention on high-flex zones like elbows, shoulders, and cuffs.
Allow Absorption: Let the jacket absorb the oils for 12 to 24 hours. The dried hide will act like a sponge, drinking in the lipids.
Repeat Application: For severely dried vintage pieces, apply two to three consecutive thin coats over a 48-hour period until the leather feels supple and bends without resistance. To prevent future brittleness, explore our preventative breakdown on how to stop leather from cracking over time.
Phase Three: Repairing Cracks and Restoring Faded Color
Once the hide is flexible, inspect the surface for color loss, abrasions, or hairline cracks caused by past friction.
Treating Crevices: For visible surface cracks, use a fine spatula to smooth a tiny amount of flexible leather filler into the groove. Let it dry for two hours. To master advanced structural patch techniques, reference our guide on how to repair cracked leather damage.
Restoring Rich Color: Sun exposure often bleaches vintage black and brown dyes. Apply a color-matched leather recoloring balm using a clean sponge. Work the pigment across faded seams and wear marks, feathering it into the surrounding panels to maintain natural tonal depth.
Buff to a Natural Sheen: Allow the pigment to set for one hour, then vigorously buff the entire garment with a clean horsehair brush to generate natural friction warmth and a subtle satin glow.
Phase Four: Long-Term Protection and Safe Storage
The final step in your restoration journey is locking in the restored moisture and protecting the renewed surface from environmental stressors.
Apply a light protective topcoat containing natural beeswax. This creates a breathable, semi-hydrophobic barrier that guards against sudden rain showers while allowing the internal leather fibers to breathe. Always hang your restored outerwear on wide, contoured wooden hangers inside a dark, climate-controlled closet. To establish a complete long-term maintenance calendar, study our definitive leather jacket care guide.
Internal and External Resources
To ensure your restored outerwear collection remains in pristine condition, explore these authoritative resources:
Internal: Curious about classic silhouettes? Check out our curated catalog of timeless mens classic jackets to study vintage tailoring aesthetics.
Internal: Wondering how old hides hold up over a lifetime? Read our real-world retrospective on leather jacket after 10 years of daily wear.
External: Visit the Leather Working Group to study international benchmarks for sustainable hide longevity, tanning chemistry, and care.
External: Consult the textile and materials preservation archives at Britannica to research historical tanning agents and the structural science of animal skins.
Conclusion
Knowing how to restore old leather transforms brittle, neglected vintage pieces into standout wardrobe centerpieces brimming with timeless character. By following a structured approach—cleaning away decades of surface dirt, slowly replenishing essential oils with thin layers of deep conditioner, patching micro-fissures, and blending faded tones with rich pigments—you preserve the soul and structural integrity of authentic craftsmanship. Treat aged leather with patience and respect, and your restored heirloom will serve you faithfully for decades to come.