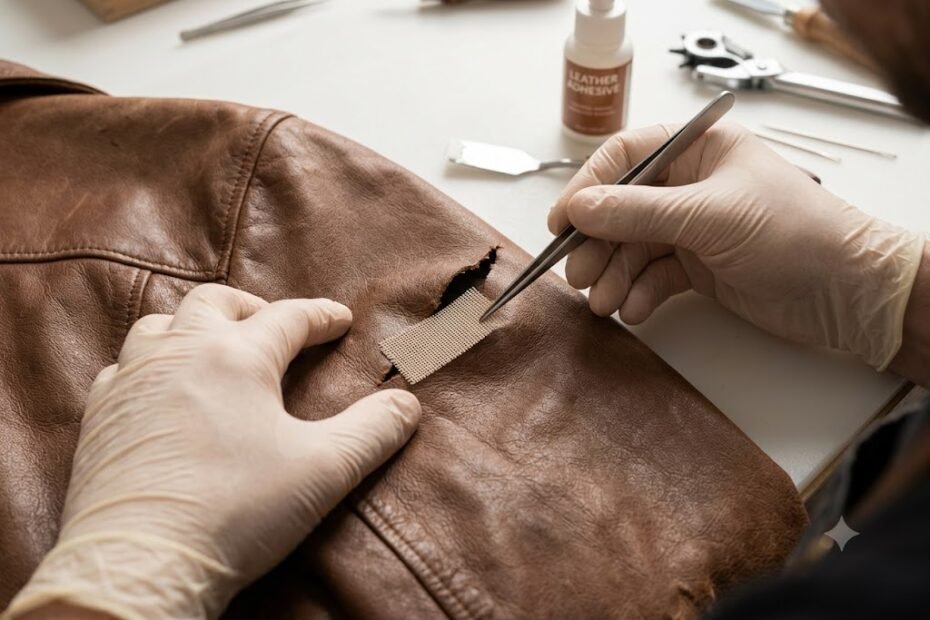
Discovering a tear, snag, or jagged rip in your favorite leather coat is a sickening feeling. Whether your sleeve caught on a sharp door frame or endured an unfortunate scrape outdoors, a sudden tear feels like a permanent destruction of your investment piece. Because genuine leather is an organic skin rather than a woven textile, you cannot simply grab a needle and thread to sew a tear back together without leaving unsightly needle punctures and structural weakness along the seam line.
Fortunately, learning how to repair leather coat tear damage does not require years of artisan leatherworking experience. With the right sub-patching materials, flexible leather adhesives, and surface-grain matching compounds, you can restore structural integrity and make the rip virtually invisible to the naked eye. This comprehensive operational guide details the exact steps, tools, and technical mechanics required to fix rips, punctures, and jagged tears at home, ensuring your outerwear remains durable and stylish.
Assessing the Damage: Can You Fix It at Home?
Before purchasing repair supplies, carefully examine the geometry and depth of the tear to determine the appropriate approach.
| Damage Type | Structural Characteristic | Recommended Repair Strategy |
| L-Shaped / Flap Tear | A triangular flap cut into the hide without missing material | Ideal for Home Repair. Sub-patching and flexible contact cement will restore it completely. |
| Straight Clean Cut | A clean slice across the leather grain | Ideal for Home Repair. Simple sub-patch adhesion and grain matching. |
| Puncture Hole | A small round hole missing actual leather material | Requires Filler. Sub-patch plus flexible liquid leather grain filler. |
| Massive Stress Tear | A wide rip along a heavily strained seam line | Professional Tailor. Requires internal panel replacement or heavy structural reinforcing. |
If the tear is located in a low-stress area (such as the chest, back panel, or upper arm) and still retains the original leather flap, you can achieve a nearly invisible result at home. For general maintenance and troubleshooting other localized damage, explore our comprehensive index on repair leather jacket solutions.
The Secret Technique: The Internal Sub-Patch Method
The single biggest mistake beginners make when attempting a repair leather coat tear project is applying glue directly on top of the outer hide. Applying adhesive externally leaves a messy, glossy residue that ruins the texture and darkens the leather permanently.
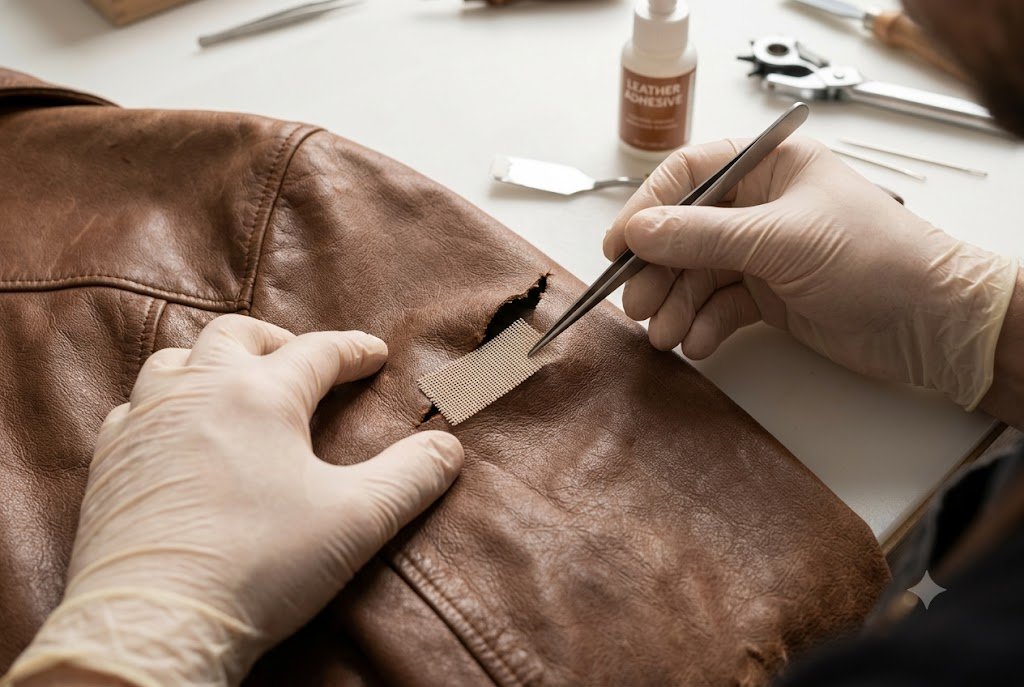
Professional leather craftspeople use the sub-patch method. This involves placing a flexible fabric or thin leather patch underneath the tear, inside the core layer of the hide. The damaged outer flaps are then glued flat onto the sub-patch, eliminating surface tension and creating a smooth, seamless bond.
Essential Tools Required
Before starting your repair, gather the following specialist materials:
Sub-Patch Material: A small piece of strong canvas, denim, or thin flexible leather (slightly larger than the tear).
Flexible Leather Adhesive: Contact cement or specialized flexible leather glue (never use rigid superglue or hot glue).
Tweezers & Toothpicks: For inserting and positioning the sub-patch and applying glue precisely.
Wax Paper & Heavy Books: For pressing the repair flat while curing.
Leather Conditioner: To restore moisture and smooth the surrounding grain.
Step-by-Step Guide: How to Repair Leather Coat Tear
Follow this precise six-step protocol to fix your leather coat tear with professional-grade strength.
Step 1: Clean the Area and Trim Loose Threads
Carefully wipe the damaged area with a damp microfiber cloth to remove dust, oil, and surface debris. Inspect the edges of the rip for frayed backing fibers or fuzzy threads. Use small, sharp embroidery scissors to trim away loose threads so the edges of the leather can meet flush without bunching up.
Step 2: Access the Reverse Side of the Hide
If your coat features an interior fabric lining, you need to reach the underside of the leather hide. Locate the nearest interior lining seam and carefully unpick a 3-to-4-inch opening using a seam ripper. This gives you direct access to insert the sub-patch behind the tear. If unpicking the lining is not an option, you can insert the sub-patch directly through the front rip using tweezers. To understand how lining layers interact with the leather shell, review our technical guide on leather jacket lining construction.
Step 3: Cut and Position the Sub-Patch
Cut your canvas or sub-patch material so that it is roughly 0.5 inches larger than the tear on all sides, rounding off the corners to prevent sharp edges from peeling over time. Using tweezers, slide the sub-patch through the tear (or via the unpicked lining) so it sits flat against the underside of the leather hide, directly centered beneath the rip.
Step 4: Apply Flexible Adhesive
Using a toothpick or small spatula, slide a thin, even layer of flexible leather adhesive between the underside of the leather hide and the top face of the sub-patch. Be careful not to glob adhesive onto the exposed outer grain of the leather.
Step 5: Align the Flaps and Press Flat
Carefully press the leather flap down onto the sticky sub-patch. Use your fingers to gently push the torn edges toward each other until they meet perfectly flush, closing the gap completely. Place a piece of wax paper over the repair to prevent sticking, and weigh it down with a heavy book or flat block for 2 to 4 hours while the adhesive cures.
Step 6: Seal and Condition the Surface
Once cured, remove the weight and wax paper. If a hairline seam line remains visible, apply a tiny drop of color-matched liquid leather filler, smoothing it flat with a plastic card. Finish by massaging a small amount of premium conditioner into the area to blend the texture. To keep the rest of your jacket supple and prevent dry brittleness, check our complete leather jacket care guide.
What to Avoid: Common Repair Pitfalls
Never Use Rigid Superglue: Cyanoacrylate adhesives (superglue) dry into a hard, crystalline plastic. When the leather flexes, the hardened glue will tear the surrounding hide, creating a much larger hole.
Never Pull or Stretch the Leather: Avoid pulling hard on the edges of the tear while gluing, as this distorts the surrounding grain panel permanently.
Avoid Excessive Heat: Do not attempt to dry the adhesive quickly using a hairdryer on high heat, which shrinks and curls the hide.
Internal and External Resources
To keep your investment outerwear in pristine condition for a lifetime, explore these authoritative resources:
Internal: Dealing with scuffs rather than a full rip? Learn how to restore your coat’s surface using our step-by-step guide on remove scratches from leather jacket damage.
Internal: Unsure if your coat hide is genuine? Test its properties through our guide on how to identify full grain leather.
External: Visit the Leather Working Group to study material standards and sustainable leather care practices.
External: Consult Britannica to research the history and structural physics of animal hide tanning techniques.
Conclusion
Mastering how to repair leather coat tear damage allows you to save a prized garment from the trash pile and extend its lifespan significantly. By employing the sub-patch method, choosing a flexible contact adhesive, and taking time to align the torn edges flush, you can make structural damage virtually invisible. Respect the natural properties of your hide, maintain it with proper conditioning, and wear your restored coat with complete confidence.