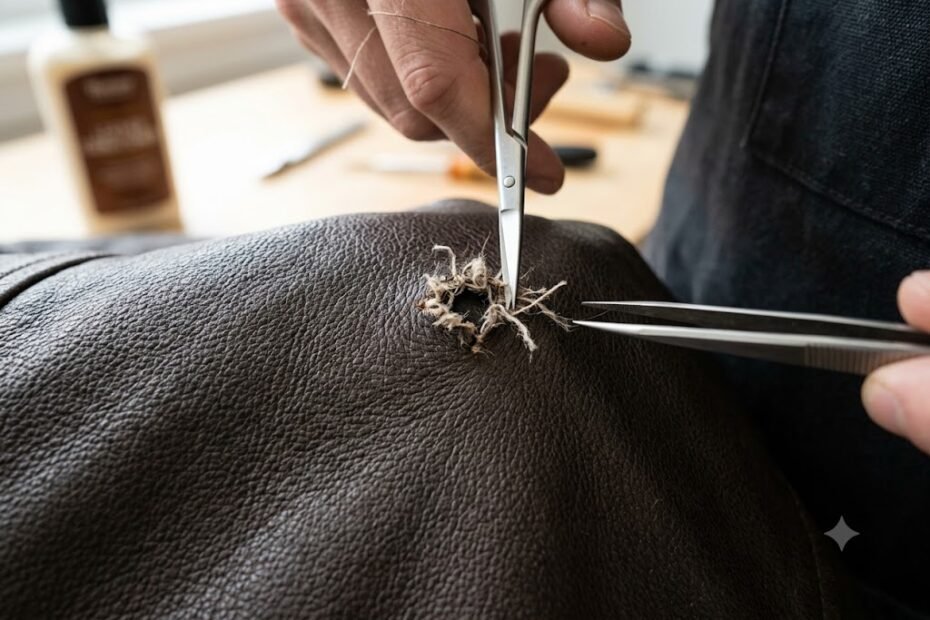
Discovering a hole or tear in your favorite leather jacket can instantly set off alarm bells. Whether you caught your sleeve on a sharp fence, suffered a minor snag while riding your motorcycle, or noticed an old puncture mark on a vintage coat, your initial reaction is likely panic. Leather is widely considered a luxurious, high-value material, and many owners assume that once the surface hide is punctured, the entire garment is ruined beyond salvation.
The good news is that you do not need to throw away your beloved garment or spend hundreds of dollars at a specialist repair shop. Learning how to fix hole in leather jacket at home is an achievable DIY skill that requires patience, the right materials, and systematic execution. With modern leather repair compounds and sub-patch techniques, you can structuralize the damaged area, fill the void, and blend the color so seamlessly that the initial hole becomes virtually invisible to the naked eye.
In this ultimate 2026 repair manual, we will walk you through the essential tools required, safety precautions, and a detailed 5-step restoration process. From stabilizing structural fibers to color-matching your finish, here is everything you need to know to bring your leather back to life.
1. Assessing the Damage: Puncture vs. Tear vs. Burn Hole
Before jumping into the step-by-step process of how to fix hole in leather jacket, you must diagnose the specific nature of the damage. Different types of holes dictate slightly different sub-patch strategies and filler quantities.
Small Punctures and Snags
Small punctures (such as those caused by pin badges, sharp nails, or animal claws) usually leave the surrounding leather fibers intact. The material has simply been pushed aside rather than entirely lost. These are the easiest holes to repair because the edges can be brought together with minimal filler required.
Clean Tears and L-Shaped Rips
A clean tear or an L-shaped rip happens when the leather catches on an edge and splits open. While the hole looks dramatic, no actual hide material is missing. By using a backing sub-patch and specialized flexible leather glue, you can realign the jagged edges precisely before sealing the surface seam.
Gaping Holes and Burn Marks
A gaping hole—where a piece of the hide has been completely torn away or burnt through—requires a full fill-and-texture restoration. In these scenarios, you must rely on a heavy-duty sub-patch to create a new artificial foundation, followed by multiple thin layers of flexible liquid leather filler to rebuild the missing mass. If your garment is suffering from extensive structural cracking rather than a localized hole, take a look at our companion guide on how to repair cracked leather for specialized care.
2. Gathering Your Essential DIY Repair Toolkit
To achieve a professional-grade finish when learning how to fix hole in leather jacket, you should avoid improvised household quick-fixes like duct tape, superglue, or standard fabric glue. Superglue dries stiff and brittle, which will cause the surrounding leather to snap and crack further as you wear the garment.
The Professional Leather Repair Arsenal
Sub-Patch Material: A small piece of thin, durable fabric (such as canvas, denim, or thin flexible leather) that is larger than the hole.
Flexible Leather Adhesive: Specialized contact cement or vinyl/leather glue that remains pliable and bendable after curing.
Heavy-Duty Tweezers and Micro-Spatula: Tools for maneuvering the sub-patch inside the hole and smoothing out filler.
Liquid Leather Filler / Repair Compound: A heat-set or air-dry acrylic-based compound designed to fill voids and mimic leather flexibility.
Fine-Grain Sandpaper (400 to 800 Grit): For smoothing out the cured filler surface flush with the surrounding hide.
Matching Leather Colorant / Dye: Alcohol or water-based pigment matching your jacket’s exact shade (black, dark brown, tan, etc.).
Leather Conditioner: To nourish the surrounding hide once the repair process is complete.
For a broader understanding of general garment maintenance and surface preservation, bookmark our official leather jacket care guide before starting your project.
3. Step 1: Cleaning and Trimming the Damaged Area
The foundation of any long-lasting leather repair is proper surface preparation. Attempting to apply adhesives or fillers over dirty, greasy, or fraying leather fibers will prevent the sub-patch from bonding correctly.
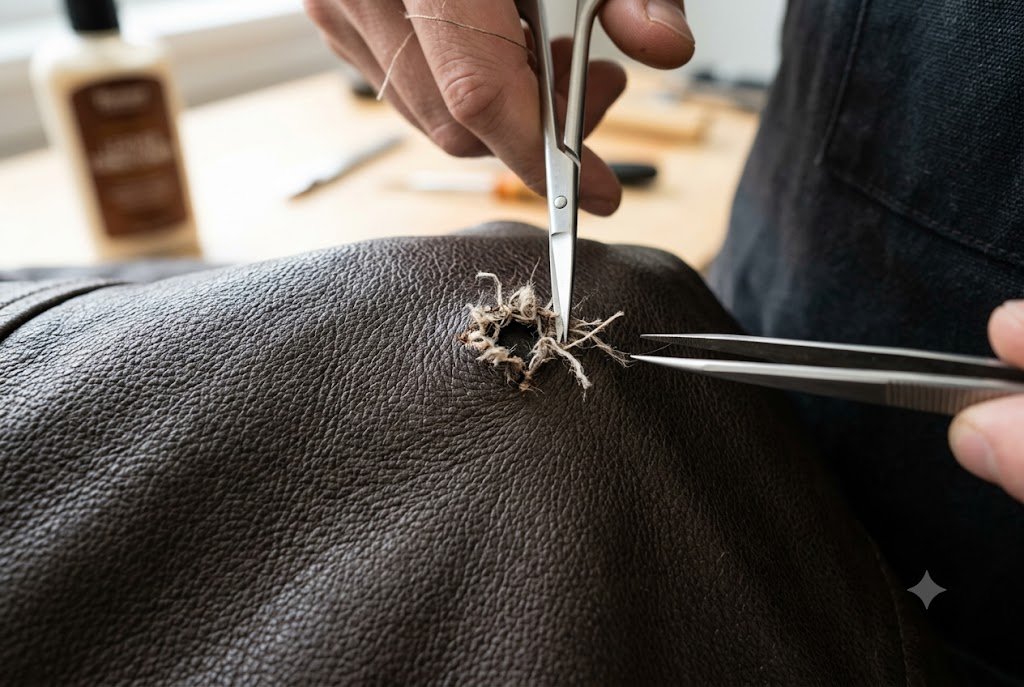
Begin by wiping down the leather hide immediately surrounding the hole using a lint-free microfiber cloth lightly dampened with a mild leather cleaner or gentle soapy water. Allow the area to air-dry completely.
Next, inspect the edges of the hole. If you see loose, frayed threads or jagged, hanging bits of fiber protruding from the hole, take a sharp pair of embroidery scissors and carefully trim them away. Creating clean, crisp edges around the perimeter makes it significantly easier to blend the filler seamlessly later on. If your jacket hide feels stiff or unyielding during prep, review our steps on how to soften stiff leather to restore its natural pliability.
4. Step 2: Inserting and Securing the Sub-Patch Foundation
This is the most critical step when discovering how to fix hole in leather jacket securely. Without a structural backing sub-patch, any filler you apply will simply sink straight through the hole and onto your jacket’s inner lining.
Inserting the Sub-Patch
Cut a piece of your sub-patch material (canvas or thin leather) into a rounded shape—avoid sharp square corners, as rounded edges prevent peeling under stress. The sub-patch should be roughly 0.5 inches (1.2 cm) larger than the hole in all directions.
Using heavy-duty tweezers, gently slide the sub-patch through the hole, positioning it flat underneath the damaged hide so it sits sandwiched between the leather shell and the inner fabric lining.
Use the blunt end of a micro-spatula or a cotton swab to smooth out the sub-patch, ensuring it lays completely flat without any wrinkles or folds.
Applying the Leather Adhesive
Once the sub-patch is centered beneath the hole, apply a small amount of flexible leather adhesive to the tip of a toothpick or spatula. Carefully spread the glue between the underside of the leather hide and the top surface of the sub-patch around the entire inner perimeter of the hole.
Press the leather hide firmly down onto the glued sub-patch for 30 to 60 seconds. Use a ruler or flat tool to press the edges of the tear flush against each other. Allow this foundation layer to dry completely for at least 2 to 3 hours before moving on.
5. Step 3: Applying Flexible Leather Filler
Now that your hole has a solid, stabilized backing layer, it is time to fill the void and restore a flat plane across the garment.
Layering the Repair Compound
Do not attempt to fill a deep hole with one single thick blob of filler. Thick applications dry unevenly, crack easily, and leave an unnatural, bumpy profile.
Scoop a tiny amount of liquid leather filler onto your spatula.
Spread a thin, smooth layer over the exposed sub-patch inside the hole, working the compound directly against the surrounding edges of the original leather.
Allow the first layer to air-dry for 30 to 45 minutes (or use a hairdryer on a low, cool setting to speed up curing).
Apply a second (and if necessary, third) thin layer of filler until the level of the repair compound sits flush with—or slightly above—the surrounding hide surface.
According to leather craftsmanship guides archived by Britannica, flexible acrylic compounds mimic the collagen matrix of animal skins, allowing restored sections to expand and contract naturally during normal body movement.
6. Step 4: Sanding Flush and Mimicking Leather Grain Texture
Once your final layer of leather filler has cured completely (preferably left overnight), you will be left with a smooth, raised patch. To make the repair invisible, you must sand it flush and recreate the natural leather grain pattern.
Precision Sanding
Take a sheet of ultra-fine 600-grit or 800-grit sandpaper and gently sand the cured filler in soft, circular motions. Be careful not to sand aggressively against the surrounding original hide. The goal is to feather the edges of the repair compound until there is zero noticeable ridge when you slide your finger across the surface.
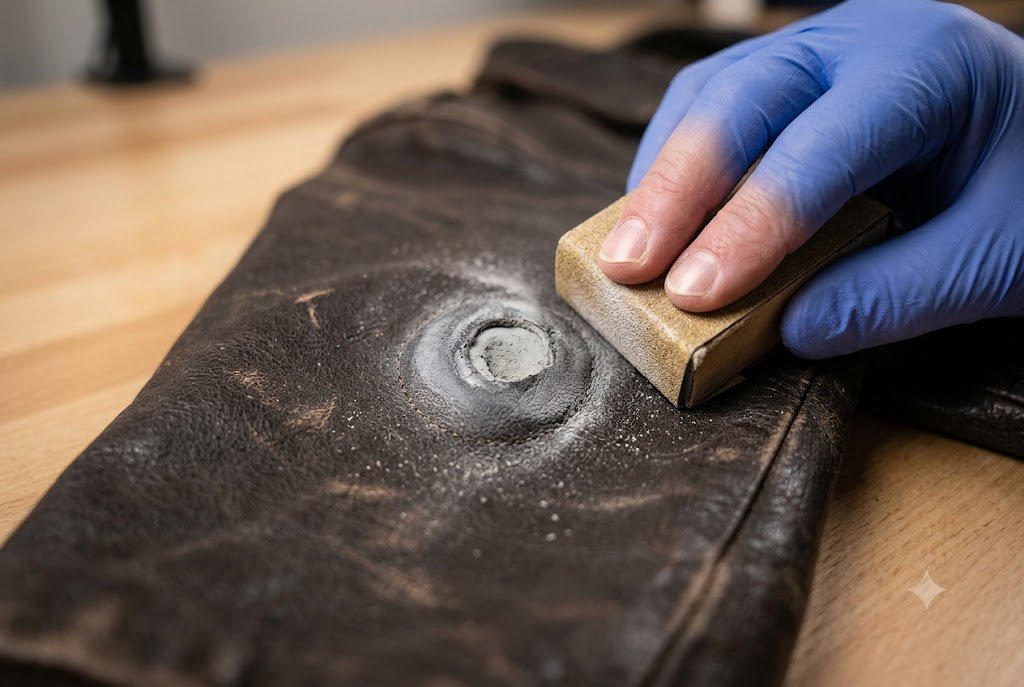
Recreating the Grain Pattern
Real animal hides—whether cowhide, sheepskin, or lambskin—are never perfectly smooth; they possess unique grain pores and lines. While the last layer of filler is about 80% dry (tacky to the touch), you can press a piece of plastic wrap or a textured leather grain stamp firmly onto the patch for a few seconds to press natural-looking pore textures into the compound. If you want to identify the exact texture profile of your hide, explore our guide on what is sheepskin leather.
7. Step 5: Color-Matching, Dyeing, and Conditioning
The final phase of how to fix hole in leather jacket involves blending the color of your cured repair compound into the rest of the jacket. Raw filler is usually white, grey, or translucent, making color touch-ups mandatory.
Dye Application and Color Blending
Select a leather repair colorant or leather dye that matches your jacket. If you own a black coat, standard black leather dye works effortlessly. If your jacket is brown, tan, or an uncommon tone, test your dye mixture on a hidden area (such as the inner hem) first.
Dab a small amount of dye onto a soft sponge or cotton swab. Lightly stipple (bounce) the dye over the repair patch and feather the color outward onto the surrounding original leather.
Apply 2 to 3 thin coats, allowing each coat to dry thoroughly, until the repair area matches the depth and sheen of the rest of the garment.
Final Conditioning and Protection
Once the colorant has fully dried, the repaired area and surrounding hide need hydration. Apply a small amount of premium leather conditioner across the entire panel using a microfiber towel. Conditioning nourishes the dry hide, blends the sheen naturally, and adds a protective moisture barrier. For ongoing surface scratch management down the road, bookmark our quick-reference guide on how to remove scratches from leather jacket.
8. Professional vs. DIY Repair: When to Call an Expert
While learning how to fix hole in leather jacket at home yields fantastic results for 90% of everyday snags, punctures, and rips, certain complex situations warrant professional intervention by a certified cobbler or leather tailor.
| Repair Scenario / Parameter | Recommended DIY Approach | Professional Tailor Intervention Required |
| Small Snags & Nail Punctures | Yes (Easy) – Perfect candidate for sub-patch & filler. | Unnecessary unless you prefer hands-off repair. |
| L-Shaped Tears (< 2 inches) | Yes (Moderate) – High success rate with sub-patch. | Recommended if located on high-stress seam joints. |
| Large Missing Holes (> 2 inches) | Low Success – Requires advanced texture recreation. | Yes – May require panel replacement or stitching. |
| Thin Lambskin / Fashion Hides | Caution Required – Requires very thin patches. | Yes – Delicate skins tear easily under heavy glue. |
| Heavy Motorcycle Armor Leather | Yes (Functional) – Easy to patch for safety. | Recommended if internal impact padding is damaged. |
If your jacket suffers a massive tear across a primary load-bearing seam—or if the internal lining is completely shredded—investing in professional tailoring or exploring full panel replacement guarantees structural safety.
If you are dealing with an aging coat that is flaking due to synthetic materials rather than real hide damage, read our diagnostic overview answering can faux leather jackets last long to evaluate replacement options.
9. Sustainable Outerwear Principles and Industry Standards
Mastering the art of repairing your outerwear aligns perfectly with modern sustainable fashion ideals. Rather than discarding a high-quality leather coat at the first sign of wear, repairing snags and holes extends the life cycle of natural textiles, reducing environmental waste and carbon footprint.
To support long-term durability, leading industry organizations like the Leather Working Group evaluate tanneries globally on chemical safety, environmental protocols, and leather fiber integrity. Sourcing jackets crafted from certified sustainable hides ensures that your garment possesses the structural strength required to undergo DIY repairs, sanding, and re-dyeing repeatedly without losing its core structural integrity.
Conclusion: Restoring Your Investment to Glory
Learning how to fix hole in leather jacket gives you complete control over the longevity of your wardrobe. By following these 5 steps, you can transform a frustrating puncture into an invisible, fully stabilized patch:
Prep the surface cleanly by trimming away loose, frayed fibers.
Establish a strong foundation using a flexible backing sub-patch and leather adhesive.
Layer your filler slowly, sanding it smooth flush with the surrounding hide.
Recreate natural grain texture and blend your colorant seamlessly.
Condition the entire jacket to seal the repair and restore a rich, uniform sheen.
A quality leather jacket is designed to accumulate stories and character over a lifetime. Don’t let a small hole end its journey prematurely—arm yourself with the right tools and restore your investment piece today.
Explore Premium, Built-to-Last Outerwear
Are you looking to add a durable, timeless companion to your wardrobe rotation? Discover our handcrafted collection of mens leather jackets to find rugged cowhides, classic bombers, and sleek moto cuts built for ultimate endurance. Looking for butter-soft luxury styled to perfection? Explore our exquisite womens leather jackets collection to claim your signature lifetime piece for 2026!